


Orc's Drift at Gary Con VIII
Mar 11, 2016 17:02:07 GMT -6
jacar, Hans E Magnusson, and 2 more like this
Post by welleran on Mar 11, 2016 17:02:07 GMT -6
Probably the highlight of Garycon VIII for me was Orc's Drift, a minis game using modified Chainmail rules to reimagine the famous battle from the Anglo-Zulu war (and movie, of course). This AAR is from my perspective as a lowly subordinate and not the overall commander. What the flamin' officers do is their business!
The game essentially gave the Brits 3 rounds for each half of the turn to act (the options being move, shoot, or reload, with 'move' being allowed only during one of the three). As the Brits were equipped with Martini-Henry breech-loaders, the rifles had to be reloaded after each shot, with load status of each rifle being marked with a tack head. Officers had a Webley, the load status of which was tracked using a d6 (thus, a rifleman could fire up to two shots per half-turn if he started it loaded; the officers could shoot up to three times, with the reload taking a single action). Upon a Brit taking a hit in battle, the Orc player rolled a d6 to determine the level of injury - (1 - graze, no effect; 2-3 minor wound, remain in the fight; 4-5 serious wound, evac to hospital; 6 KIA). The seriously wounded would then roll a d6 to determine which hospital room they were in; each turn they would advance one room towards the exit, eventually emerging to rejoin the fight. The process was described as "cinematic" rather than "realistic" and it worked great. Each man could take up to two wounds, with each wound reducing by one the number of allowed actions per half turn. The Brit force consisted of six 4-man units, each with three riflemen and either an NCO or officer. My officer was Adendorf, Natal Native Contingent (and not a regular British officer).
The Zulus, er, Orcs got only one action per half of the turn (their options being move, melee, or shoot arrows if so equipped). They did move faster than the Brits (9" vs 6"). Any hit killed them, and their armor and shields were useless against rifles, but not bayonets. I am not sure their specific number but I would describe it as Lots!"
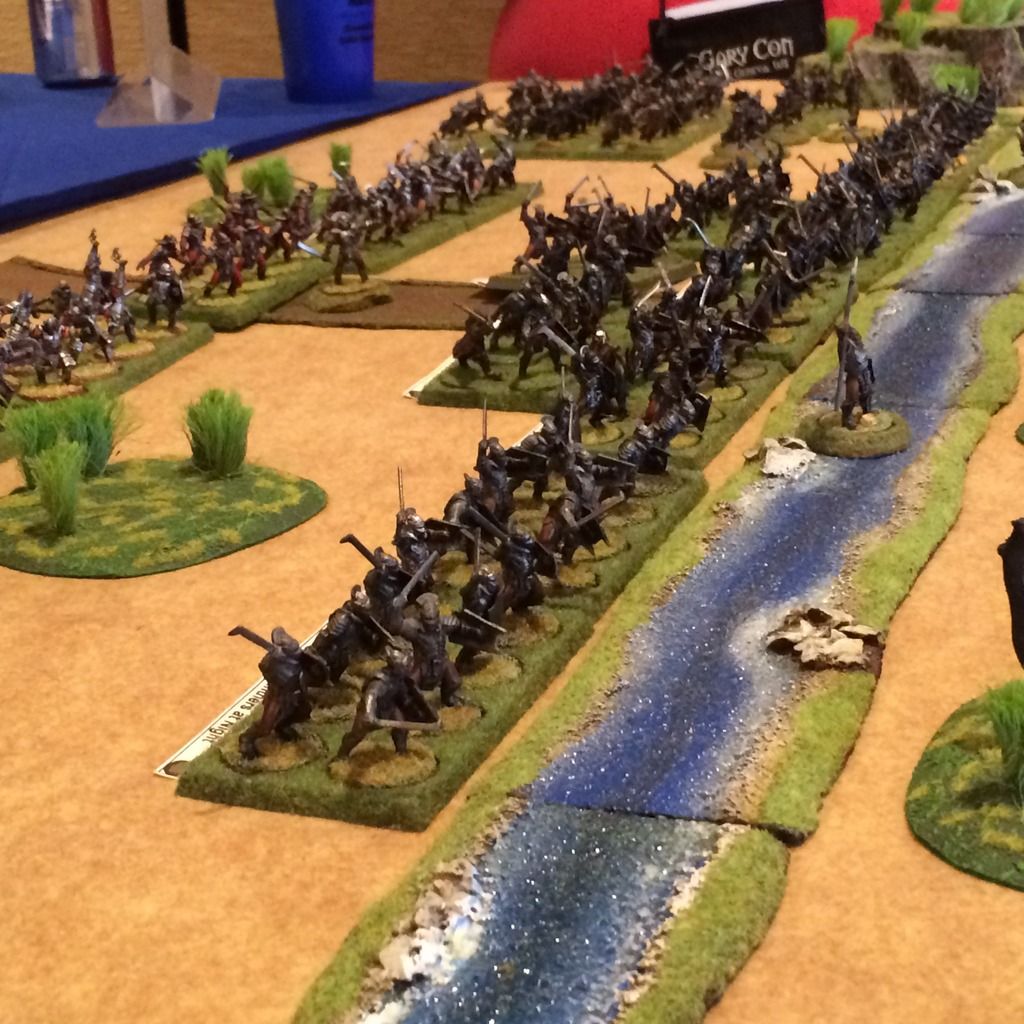
The Orcs appear across the Buffalo River in overwhelming numbers, as their shaman blesses the shields.
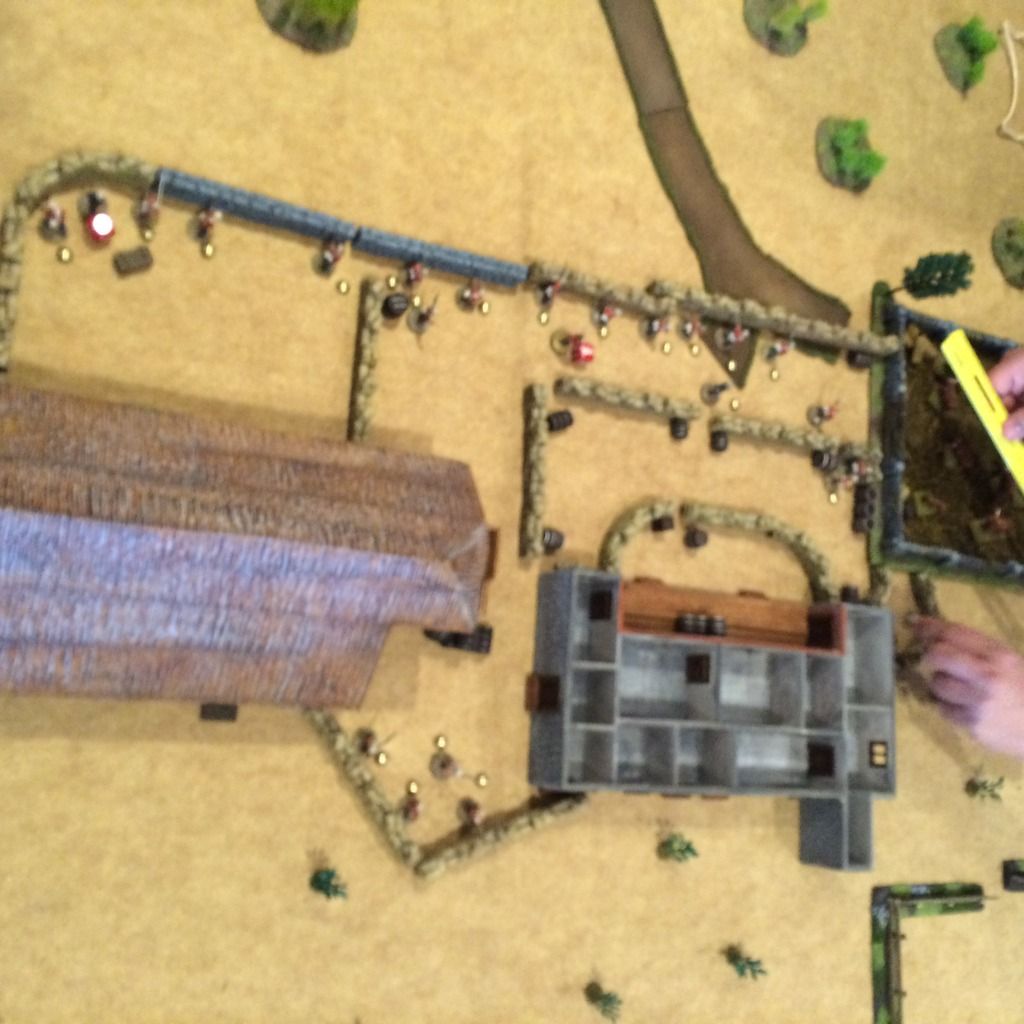
The British defense consisted of three rings, based on the hospital (top building; the interior rooms were numbered); the outer of the three rings was split by an interior wall, as well. The buildings were off limits to the Orcs. We were ordered to start with a 360-degree defense. I had the left flank (bottom right) and the rear (center right); Adendorf was with the flank unit and the NCO in the rear. We got to place three range markers which we intentionally placed too close to try to trick the enemy into a false sense of security -- this did nothing as the Orcs had no clue what they were and ran by them without any heed! Most of the defense was mealie bags, with a short section of stone wall. Gaps were left with barrels to roll into them so we could fall back quickly.
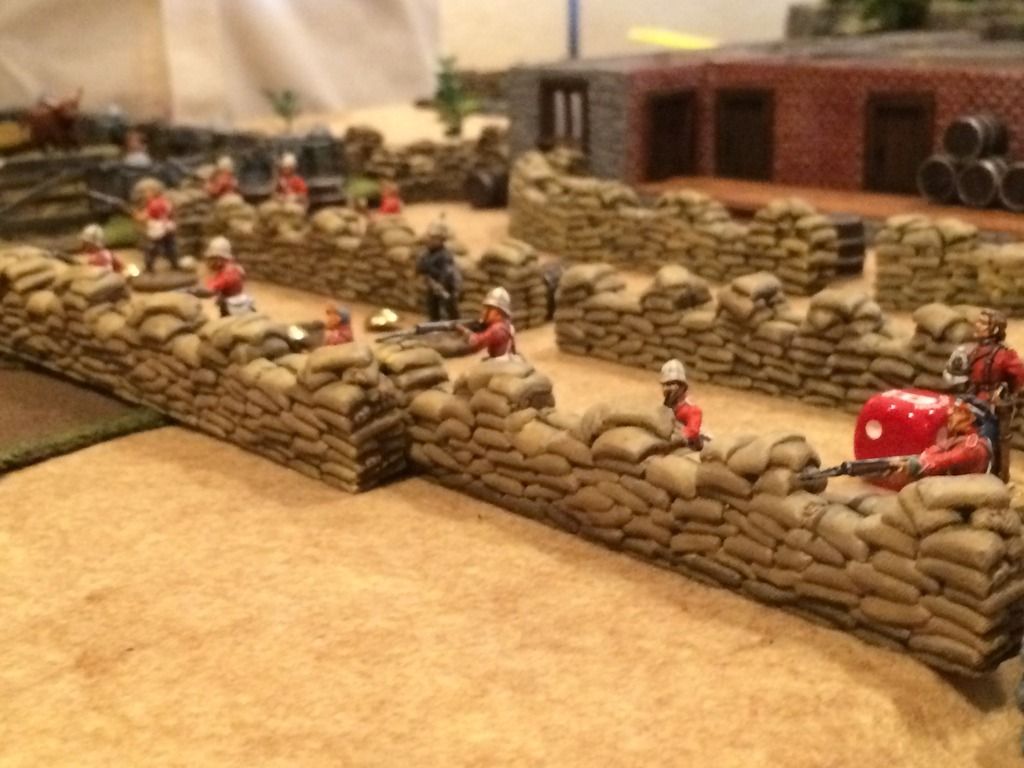
Stand fast, lads! They'll be here soon enough!
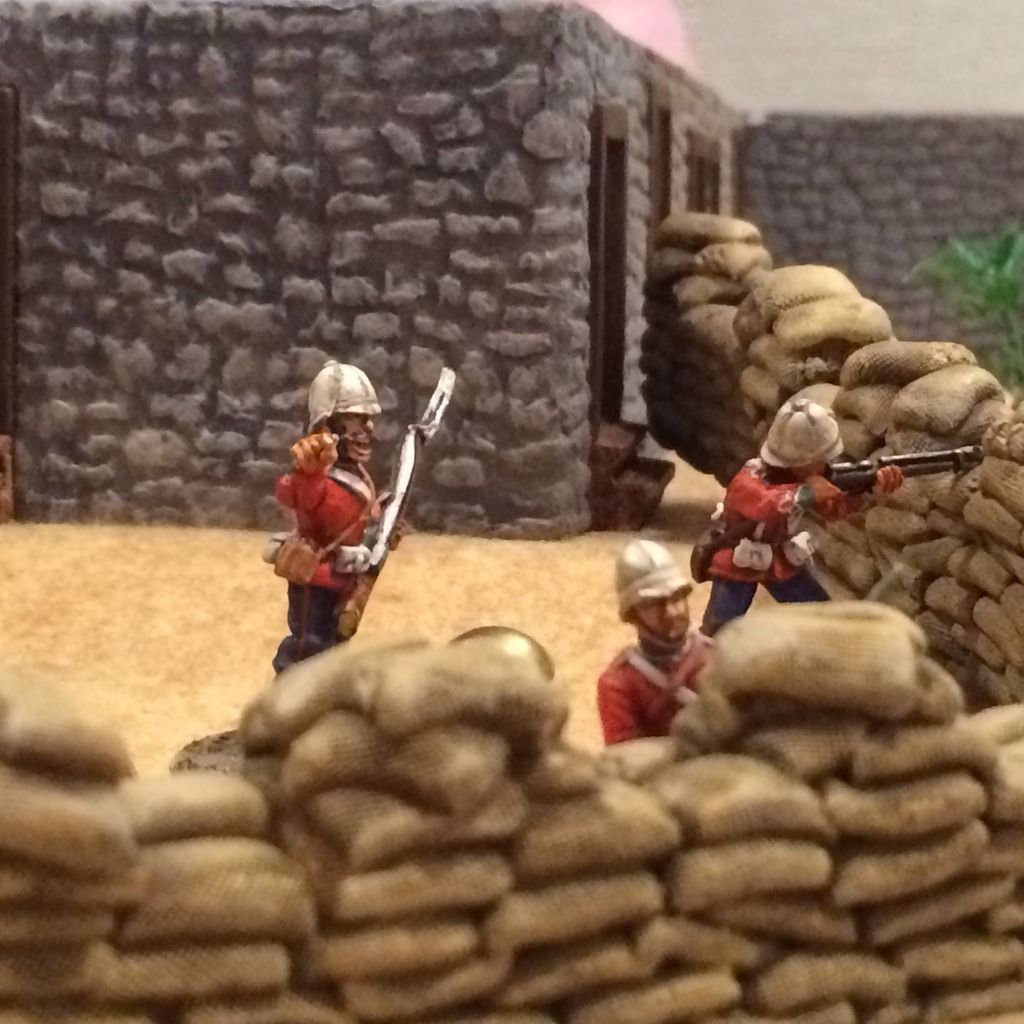
Chard (right) looks on boldly. Bromhead is to the left, with a rifle and sans pith helmet. The Orcs advanced rapidly, as is their wont. However, to the rear (not pictured) a group of Orcs appeared in the high ground behind the defenses, and began firing arrows into the rear defenders. The very first volley got a lucky shot in, and one of my riflemen fell dead, an arrow in his face! A most inauspicious start. Meanwhile, the flamin' officers almost made a fatal mistake. Bromhead's squad on the far right (previously guarding a gap between the hospital and the impassable kraal, withdrew to add firepower to the front wall. However, large Orc forces appeared very suddenly on BOTH flanks, VERY close to the walls. Bromhead lost his first wall, but managed to bottleneck that side for quite some time, but it was a close thing.
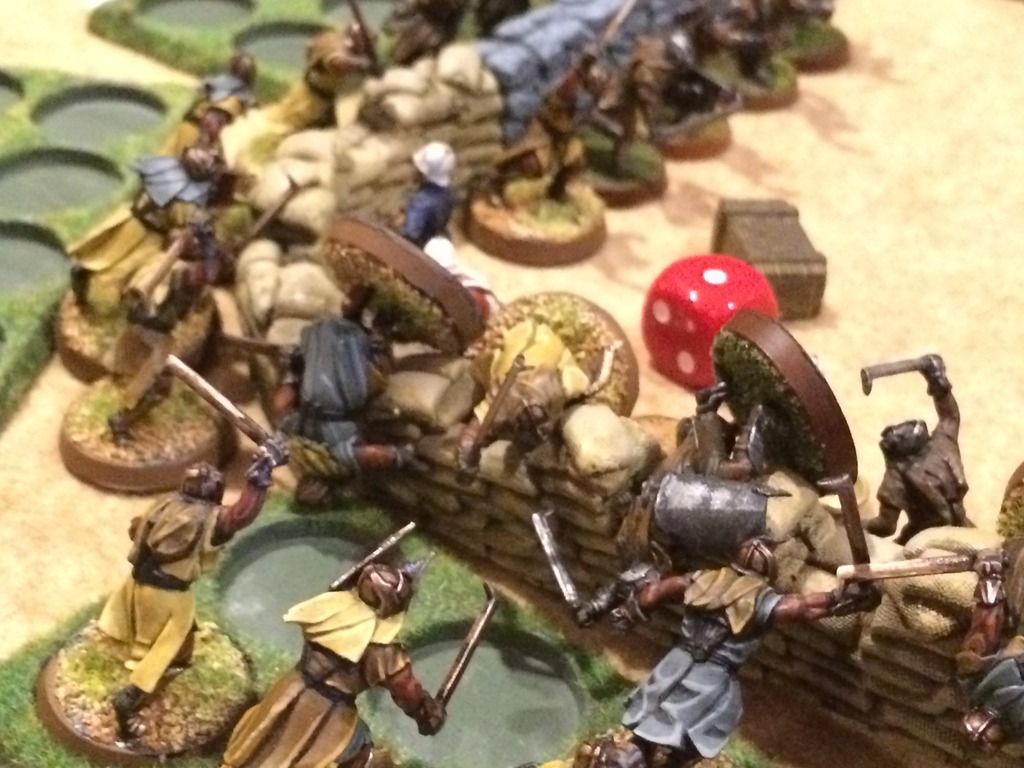
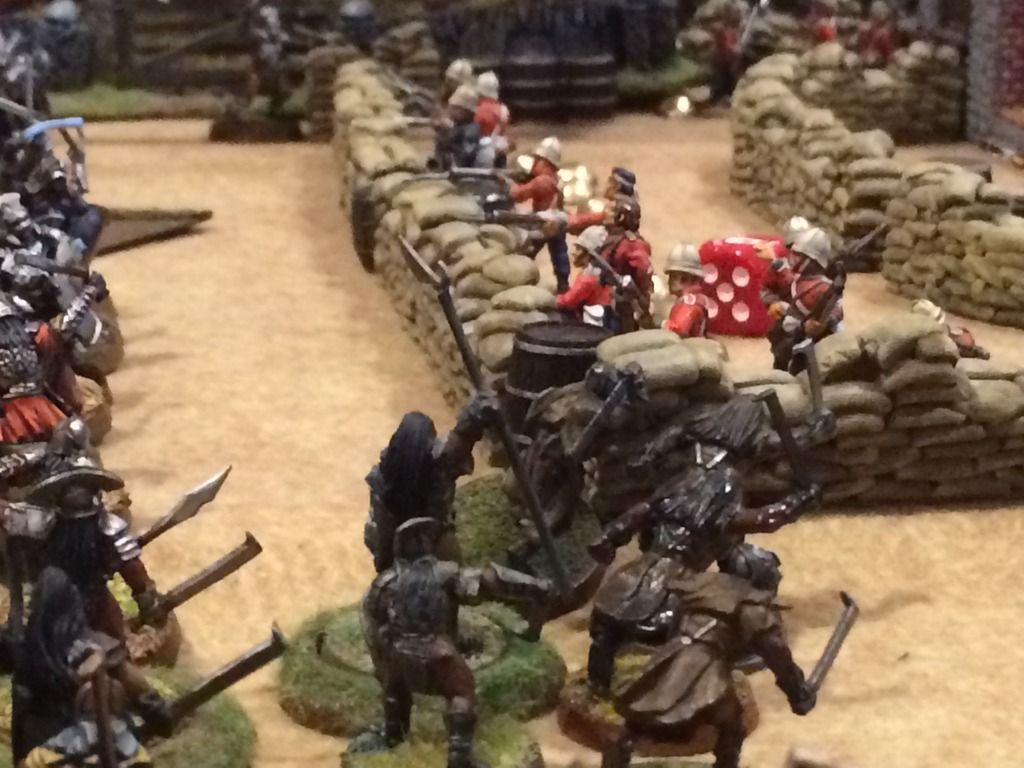
As the Orcs got closer, the rifle fire began to exact a devastating toll. However, I was too busy dealing with the force that had appeared on my flank. They were the first to reach a defended wall, and in great numbers. Here, the Orcs have engaged Adendorf's squad in melee as they rush over the low wall of mealie bags while others overtop the walls behind them. Not a pretty sight! (Note Adendorf's pistol down to one shot -- the Webley was highly effective at close range, and he emptied it more than once at the wall!) To the right center, you can see my fallen rifleman, previously killed by the first volley of arrows. His squad, having only inflicted minor losses on the archers in the high ground due to the rough terrain, have fallen back on their prepared position between the two large buildings, hoping to draw the archers into the open.

The left corner up close. An ugly sight as Zulu after Zulu rushed over! In the end, the wound rules saved most of these men as they were wounded and were evacuated to the hospital. All would make it back into the fight eventually and play a critical role near the end of the battle.
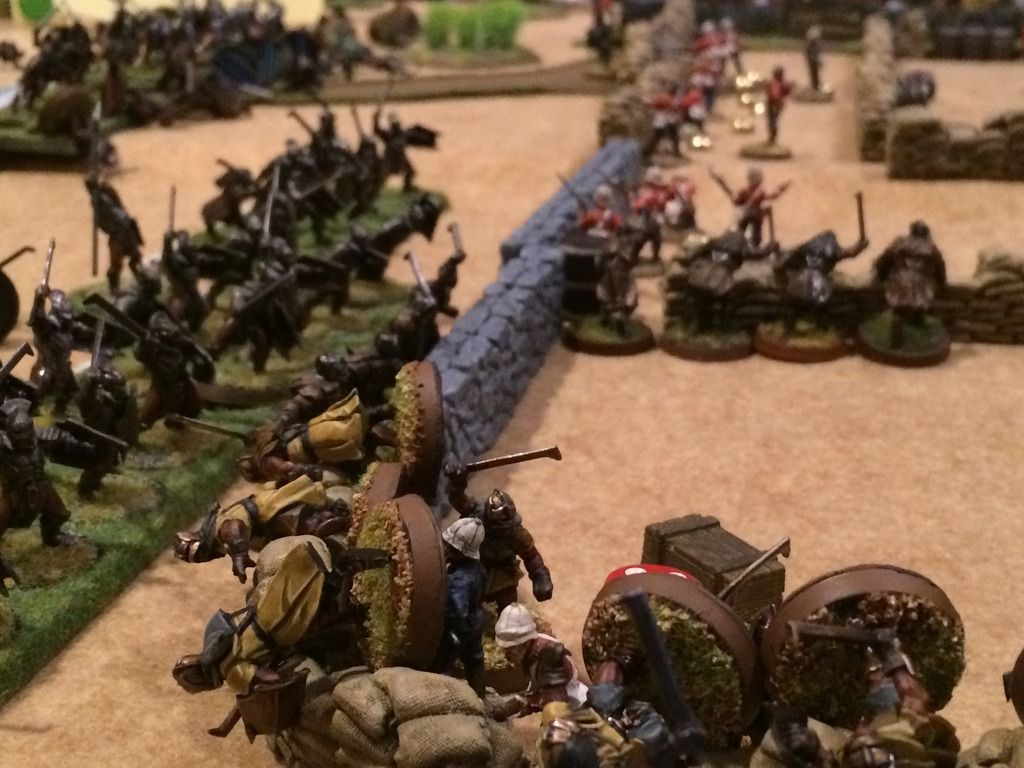
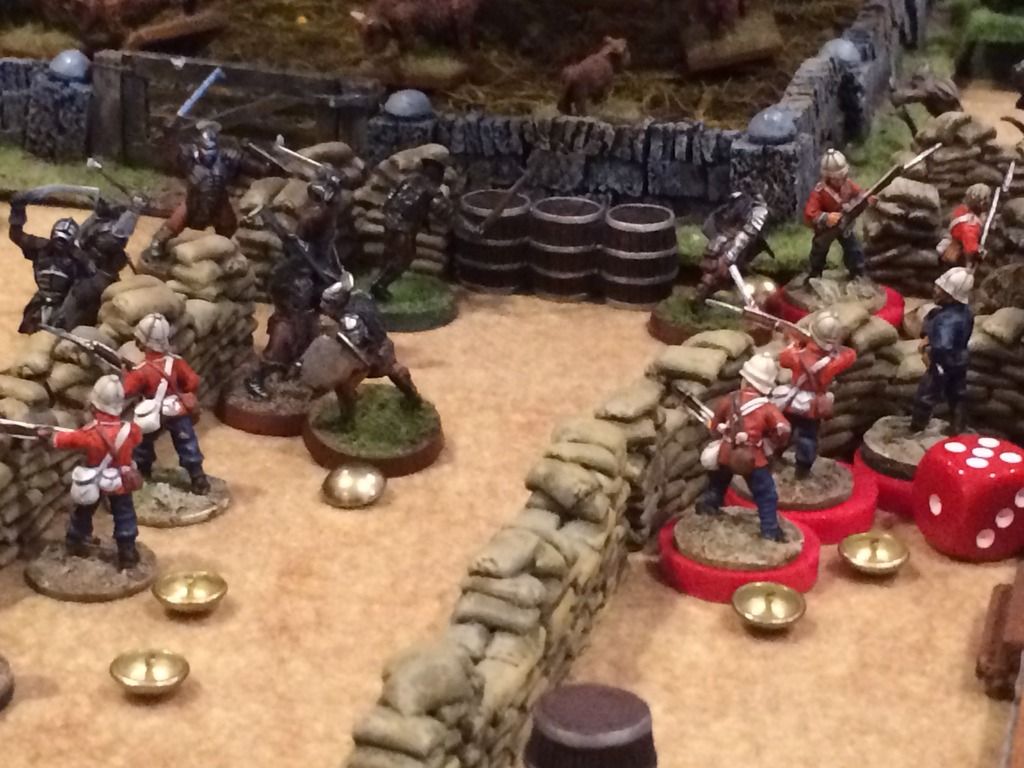
Moments later. The Orcs have so many over the wall that most ignore my squad and proceed to rush the next squad over (Brian's) as they prepare to fall back into the second redoubt.
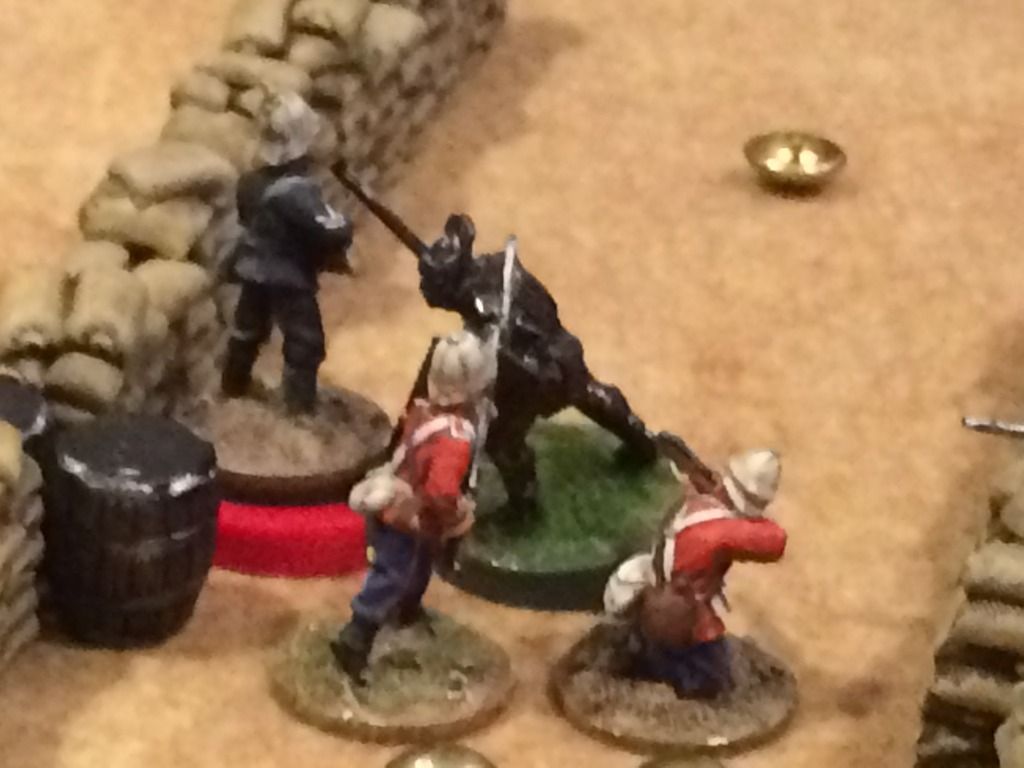
Adendorf goes down but is rushed to hospital; the rifleman pictured would follow moments later.
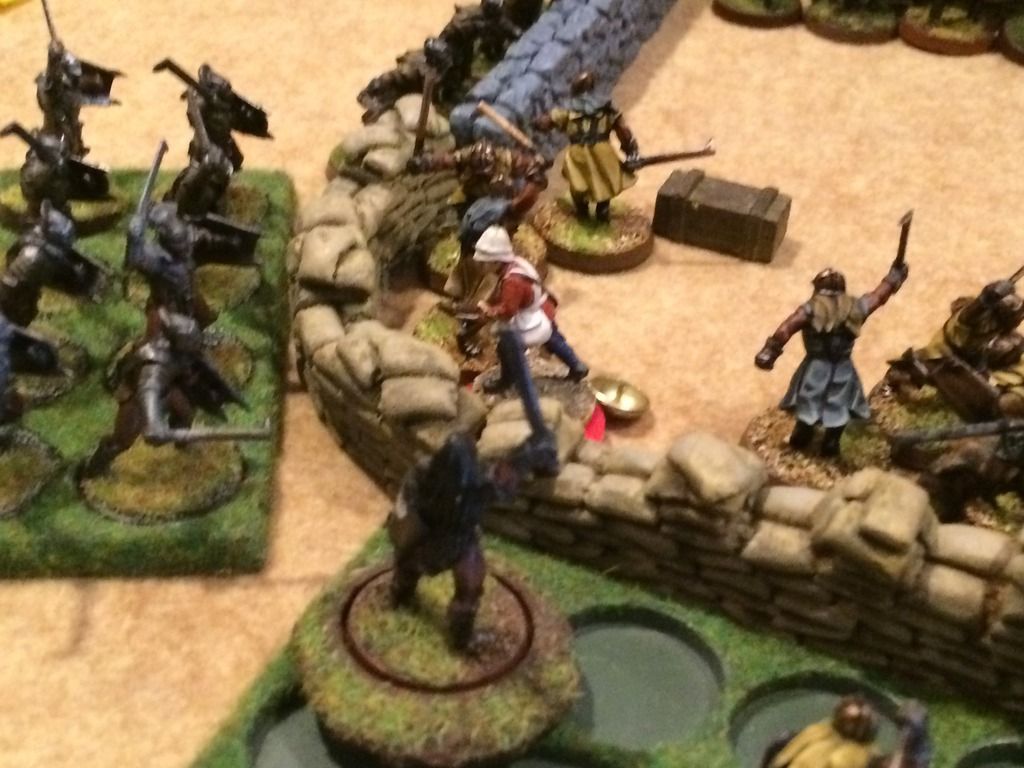
Now we come to the actions of my most gallant rifleman, who I decided was named Hook (he is the one bottom right, all alone). Young Private Hook was the last man standing of my left flank force under Adendorf. Just when it looked all over, the morale of the attacking Orc force temporarily broke, leaving a horde of cowering Orcs and one lone rifleman lording over them! "Out you get 'ookie; done your bit!" Not being a vain man, young Hook beat feet and fell back to the wall that divided the outer defenses, firing back at the Orcs as he went. Despite being outnumbered 30 to one, he proved almost unstoppable. He finally reached an entry point to the second redoubt, only to be swarmed by countless Orcs, including one of their officers. Alone, he held them off for quite some time through dint of his bayonet, cutting down Orc after Orc before, at last, succumbing to many wounds. His brave stand held the corner of the second redoubt for some time, allowing those inside to organize the defense.
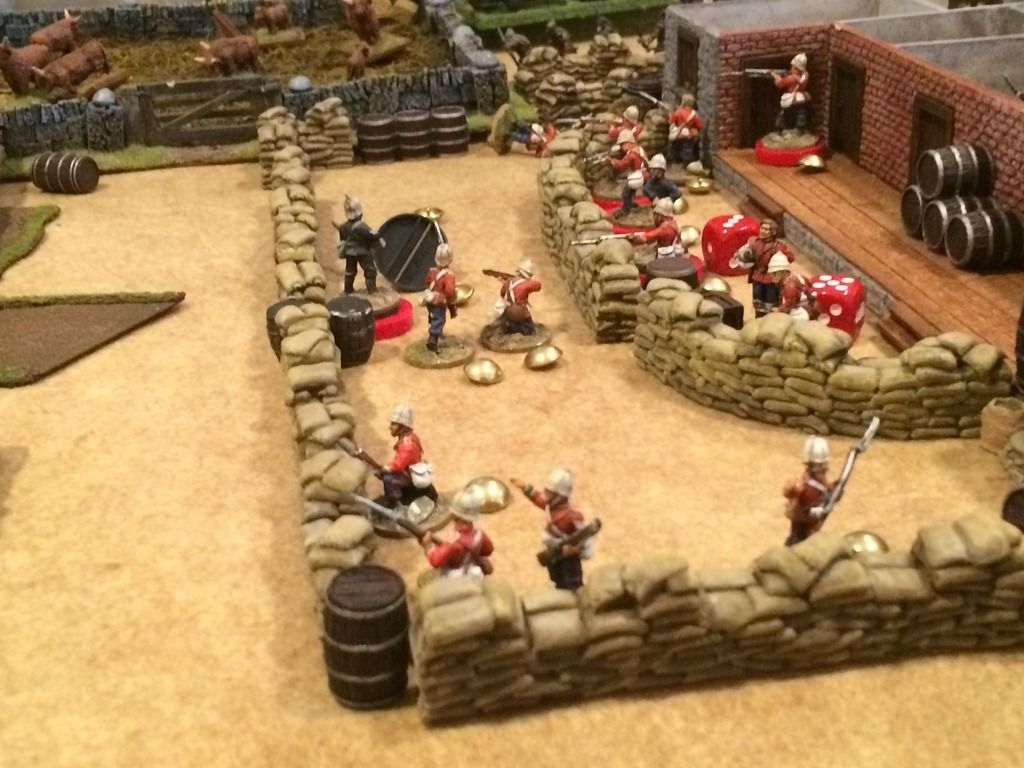
Orcs advance on the second line in force, where the other squads had managed to fall back into just in time. My rear squad had joined them, not wishing to be surrounded!
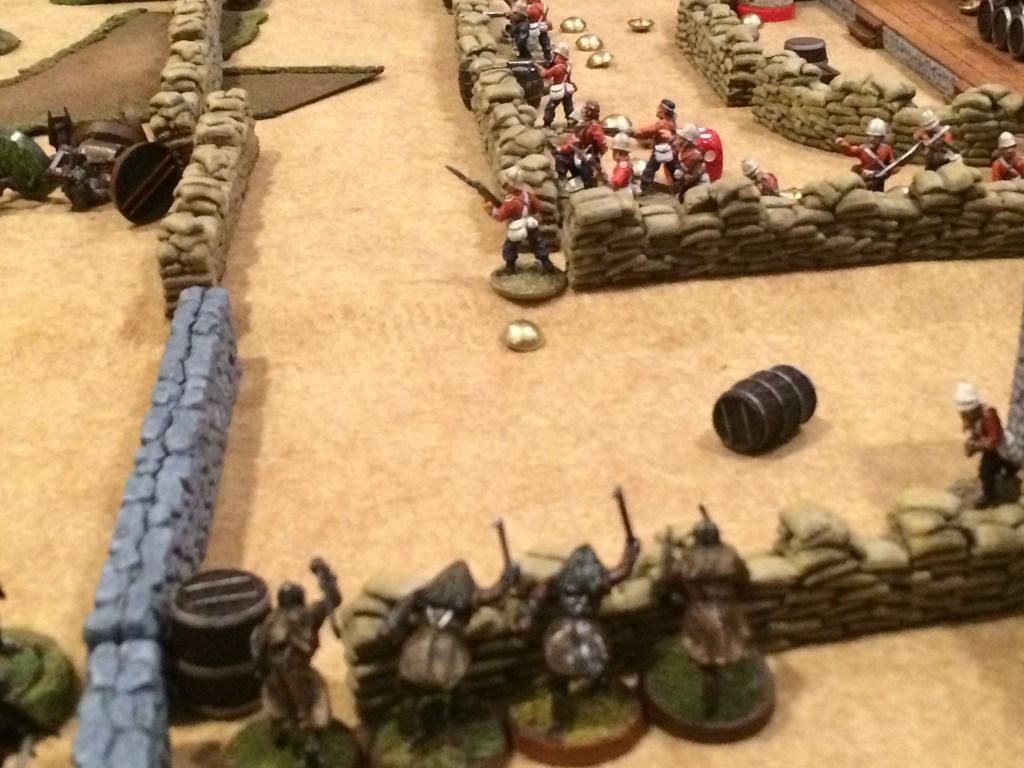
But, here the flamin' officers made their biggest mistake, leaving one of the entry points to the second redoubt uncovered, as the Orcs had discovered the secret of rolling barrels out of the way, and that one barrel was uncovered! You can see Orcs pouring in at top, swarming the riflemen both manning the second wall and those covering the corner defense at top (Bromhead showed his manliness there!). But, ace in the hole, my wounded men had begun to trickle out of the hospital. To the right are the 3 survivors of my left flank force, led by Adendorf, perfectly placed to lay fire into the gap, which they did with great gusto. Soon, the flood of Orcs slowed to a trickle and was stopped. The Orcs had culminated, their fighting power spent except for archer-skirmishers that continued to harass us.
Here, a pair of British riflemen (Brian's) make a bayonet charge to rescue their NCO who is engaged in melee with one of the few surviving Orcs. It was the only British bayonet charge of the battle, I believe.
The Orcs inside the defense slaughtered, the defenders take stock of what just happened (Orcs are visible at the top, where they continued to fire arrows into the defenders; another unit remained to the rear of the buildings).
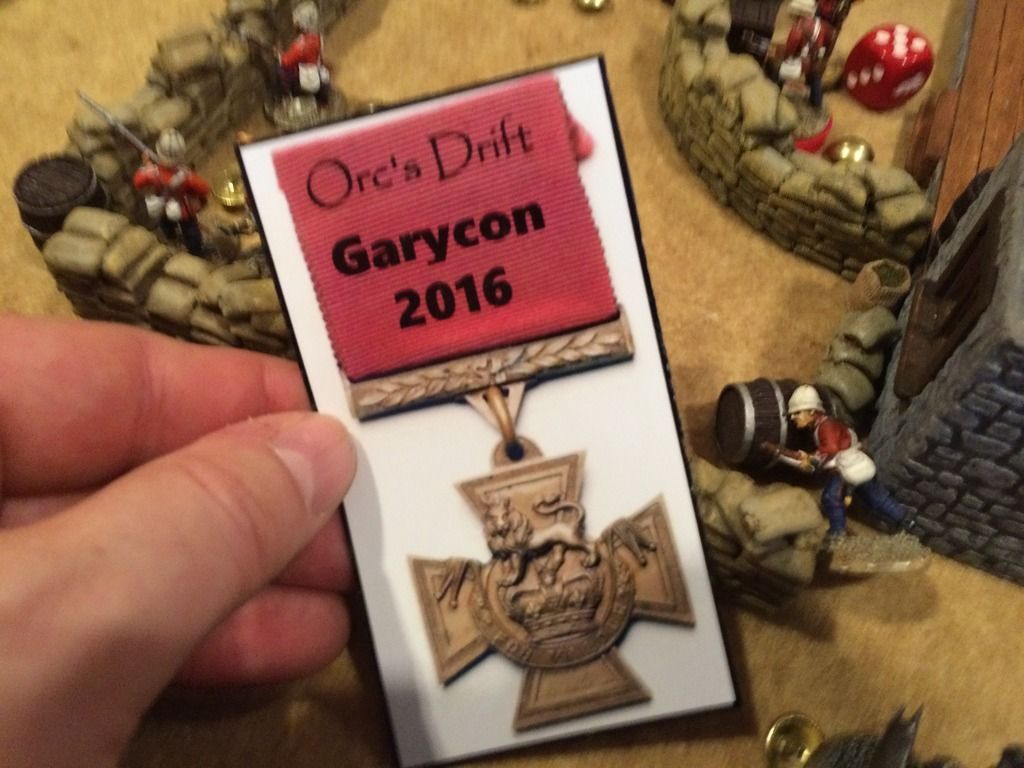
Afterwards, young Private Hook would receive the Victoria Cross, posthumously, along with two other defenders. There he lay, propped on a barrel where he fell, as if he were ready to withstand one more Orcish charge! Overall losses were around 5 British KIA and at least twice that WIA. It could have been a lot worse, but it was a Boxer Henry .45 miracle; and a bayonet, with some guts behind it.
A great game overall! I'd wanted to play in this one since I first saw it at Garycon II in 2010. It proved to be every bit as fun as I'd hoped. It was a very see-saw battle and well-balanced. Both sides felt they had victory in their grasp at times, and both sides felt defeat was inevitable at times. I can't imagine a more dramatic scenario! Thanks to Kevin Cabai for yet another awesome game.
Sadly, I don't have enough pictures to also do a good AAR for his Light the Beacons game (The Kinstrife, the Gondorian civil war, occurring several centuries before events in Lord of the Rings) but it was also a really fun one (of course).
The game essentially gave the Brits 3 rounds for each half of the turn to act (the options being move, shoot, or reload, with 'move' being allowed only during one of the three). As the Brits were equipped with Martini-Henry breech-loaders, the rifles had to be reloaded after each shot, with load status of each rifle being marked with a tack head. Officers had a Webley, the load status of which was tracked using a d6 (thus, a rifleman could fire up to two shots per half-turn if he started it loaded; the officers could shoot up to three times, with the reload taking a single action). Upon a Brit taking a hit in battle, the Orc player rolled a d6 to determine the level of injury - (1 - graze, no effect; 2-3 minor wound, remain in the fight; 4-5 serious wound, evac to hospital; 6 KIA). The seriously wounded would then roll a d6 to determine which hospital room they were in; each turn they would advance one room towards the exit, eventually emerging to rejoin the fight. The process was described as "cinematic" rather than "realistic" and it worked great. Each man could take up to two wounds, with each wound reducing by one the number of allowed actions per half turn. The Brit force consisted of six 4-man units, each with three riflemen and either an NCO or officer. My officer was Adendorf, Natal Native Contingent (and not a regular British officer).
The Zulus, er, Orcs got only one action per half of the turn (their options being move, melee, or shoot arrows if so equipped). They did move faster than the Brits (9" vs 6"). Any hit killed them, and their armor and shields were useless against rifles, but not bayonets. I am not sure their specific number but I would describe it as Lots!"
The Orcs appear across the Buffalo River in overwhelming numbers, as their shaman blesses the shields.

The British defense consisted of three rings, based on the hospital (top building; the interior rooms were numbered); the outer of the three rings was split by an interior wall, as well. The buildings were off limits to the Orcs. We were ordered to start with a 360-degree defense. I had the left flank (bottom right) and the rear (center right); Adendorf was with the flank unit and the NCO in the rear. We got to place three range markers which we intentionally placed too close to try to trick the enemy into a false sense of security -- this did nothing as the Orcs had no clue what they were and ran by them without any heed! Most of the defense was mealie bags, with a short section of stone wall. Gaps were left with barrels to roll into them so we could fall back quickly.

Stand fast, lads! They'll be here soon enough!

Chard (right) looks on boldly. Bromhead is to the left, with a rifle and sans pith helmet. The Orcs advanced rapidly, as is their wont. However, to the rear (not pictured) a group of Orcs appeared in the high ground behind the defenses, and began firing arrows into the rear defenders. The very first volley got a lucky shot in, and one of my riflemen fell dead, an arrow in his face! A most inauspicious start. Meanwhile, the flamin' officers almost made a fatal mistake. Bromhead's squad on the far right (previously guarding a gap between the hospital and the impassable kraal, withdrew to add firepower to the front wall. However, large Orc forces appeared very suddenly on BOTH flanks, VERY close to the walls. Bromhead lost his first wall, but managed to bottleneck that side for quite some time, but it was a close thing.

As the Orcs got closer, the rifle fire began to exact a devastating toll. However, I was too busy dealing with the force that had appeared on my flank. They were the first to reach a defended wall, and in great numbers. Here, the Orcs have engaged Adendorf's squad in melee as they rush over the low wall of mealie bags while others overtop the walls behind them. Not a pretty sight! (Note Adendorf's pistol down to one shot -- the Webley was highly effective at close range, and he emptied it more than once at the wall!) To the right center, you can see my fallen rifleman, previously killed by the first volley of arrows. His squad, having only inflicted minor losses on the archers in the high ground due to the rough terrain, have fallen back on their prepared position between the two large buildings, hoping to draw the archers into the open.

The left corner up close. An ugly sight as Zulu after Zulu rushed over! In the end, the wound rules saved most of these men as they were wounded and were evacuated to the hospital. All would make it back into the fight eventually and play a critical role near the end of the battle.

Moments later. The Orcs have so many over the wall that most ignore my squad and proceed to rush the next squad over (Brian's) as they prepare to fall back into the second redoubt.

Adendorf goes down but is rushed to hospital; the rifleman pictured would follow moments later.

Now we come to the actions of my most gallant rifleman, who I decided was named Hook (he is the one bottom right, all alone). Young Private Hook was the last man standing of my left flank force under Adendorf. Just when it looked all over, the morale of the attacking Orc force temporarily broke, leaving a horde of cowering Orcs and one lone rifleman lording over them! "Out you get 'ookie; done your bit!" Not being a vain man, young Hook beat feet and fell back to the wall that divided the outer defenses, firing back at the Orcs as he went. Despite being outnumbered 30 to one, he proved almost unstoppable. He finally reached an entry point to the second redoubt, only to be swarmed by countless Orcs, including one of their officers. Alone, he held them off for quite some time through dint of his bayonet, cutting down Orc after Orc before, at last, succumbing to many wounds. His brave stand held the corner of the second redoubt for some time, allowing those inside to organize the defense.

Orcs advance on the second line in force, where the other squads had managed to fall back into just in time. My rear squad had joined them, not wishing to be surrounded!

But, here the flamin' officers made their biggest mistake, leaving one of the entry points to the second redoubt uncovered, as the Orcs had discovered the secret of rolling barrels out of the way, and that one barrel was uncovered! You can see Orcs pouring in at top, swarming the riflemen both manning the second wall and those covering the corner defense at top (Bromhead showed his manliness there!). But, ace in the hole, my wounded men had begun to trickle out of the hospital. To the right are the 3 survivors of my left flank force, led by Adendorf, perfectly placed to lay fire into the gap, which they did with great gusto. Soon, the flood of Orcs slowed to a trickle and was stopped. The Orcs had culminated, their fighting power spent except for archer-skirmishers that continued to harass us.

Here, a pair of British riflemen (Brian's) make a bayonet charge to rescue their NCO who is engaged in melee with one of the few surviving Orcs. It was the only British bayonet charge of the battle, I believe.

The Orcs inside the defense slaughtered, the defenders take stock of what just happened (Orcs are visible at the top, where they continued to fire arrows into the defenders; another unit remained to the rear of the buildings).

Afterwards, young Private Hook would receive the Victoria Cross, posthumously, along with two other defenders. There he lay, propped on a barrel where he fell, as if he were ready to withstand one more Orcish charge! Overall losses were around 5 British KIA and at least twice that WIA. It could have been a lot worse, but it was a Boxer Henry .45 miracle; and a bayonet, with some guts behind it.

A great game overall! I'd wanted to play in this one since I first saw it at Garycon II in 2010. It proved to be every bit as fun as I'd hoped. It was a very see-saw battle and well-balanced. Both sides felt they had victory in their grasp at times, and both sides felt defeat was inevitable at times. I can't imagine a more dramatic scenario! Thanks to Kevin Cabai for yet another awesome game.
Sadly, I don't have enough pictures to also do a good AAR for his Light the Beacons game (The Kinstrife, the Gondorian civil war, occurring several centuries before events in Lord of the Rings) but it was also a really fun one (of course).
